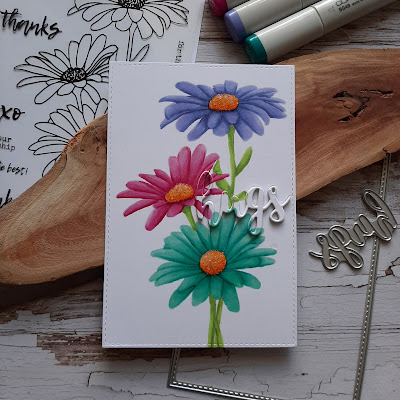
Hi Everyone,
Today I am sharing a card using a new stamp from Paper Rose.
I just love this Daisy stamp and the many things that can be done with it.
Ingredients
Stamp Set: #18493 Daisy Bouquet
Medium: Copic Markers
(YG63, YG17, YG13, YR07, YR04, YR15, YR12, BV08, BV04, BV13, BV02, RV19. RV17, RV55, BG49, BG15, BG13, BG32)
Sentiment: #18300 Hugs Layered Die
Card Stock: X-Press It Blending Card
Ink: Ink on 3 Fadeout
Other: Glossy Accents, Clear Micro Beads, Double Sided Adhesive
Method:
- Stamp 'Daisy Bouquet' onto X-Press It Blending Card using the Ink on 3 Fadeout ink.
- Colour 'Daisy Bouquet' with Copic Markers.
- Using the 3rd largest Stitched Rectangle Die, cut card.
- Adhere double sided adhesive to the back of the card.
- Place 'Hugs' die onto card. Cut. Place the card onto a piece of white card and trim to size. Layer the pieces of the 'hugs' die into the card. Set the word 'Hug' aside.
- Cut 3 more 'Hugs' out and adhere them to the card, layering them up.
- Adhere the coloured 'Hug' on top.
- Apply Glossy Accents & Clear Micro Beads to the Flower Centres.
Until next time
Melissa


