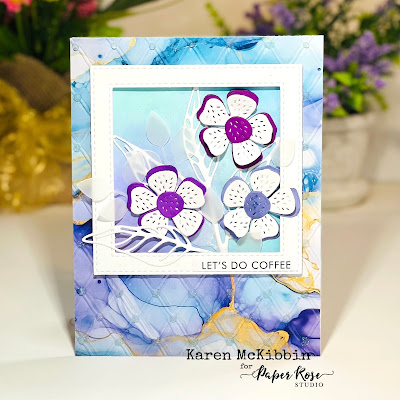
Hello and welcome back! I've got a set of 2 for 1 cards today which always makes me happy. I like to be able to immediately use the extra pieces as I have a tendency to put them away and forget about them. Here's a look at the two cards I was able to make ...
Paper Rose Studio Supplies: Tufted Elegance 3D Embossing Folder 32154, Inky Colour 6x6 Paper Collection 31896 , Elodie Flower Builder Metal Cutting Die 28477 , Hand Lettered Thanks Metal Cutting Die 25606, Leaf Outline Die Metal Cutting Die 29620 , Little Foliage 1 Metal Cutting Die 21099, So Extra White 1.0 Supporting Sentiments 20165, Stitched Square Frames Metal Cutting Die 16685.
For these cards I started with the top card first. I chose one of the pieces of Inky Colour papers and trimmed it down to make an A2 sized card front. From this, I die cut a square in the upper third portion of the card. I pieced the square back into the card front and used low tack tape on the back to keep it in position. I misted it and then put it into the embossing folder and ran it through my machine. Then I applied some Nuvo Jewel Drops in Sea Breeze over all the tufted areas, and before the drops dried, I sprinkled on a clear white glitter and then set this aside to dry.
While it was drying, I die cut out all the floral elements, leaves, frame and sentiments. For the top card, I used Copic markers to colour in the base layer of the flowers and the centers. On the bottom card, I used some Catherine Pooler inks to add a touch of colour to the outside of the petals and leaves, and to the centers. The "Thanks" die was cut three times from white cardstock and then glued together. I applied ink to the top layer to turn it a blue-purple colour and then covered it with Nuvo Crystal Glaze. I cut a few of the leaves from vellum on the top card.
To assemble the top card, I marked on my card base where the square opening would be and then did some ink blending over the opening with Distress Oxide inks. I glued the "Leaf Outline" leaf down over this, and then adhered the embossed card front to the card base. I mounted the square frame onto foam tape and popped it in place over the front opening. Then I arranged my flowers and leaves and glued them in place. Finally, I added the sentiment to the bottom of the square frame.
For the second card, I cut the remaining embossed square on the diagonal from corner to corner, creating two triangles. I cut a rectangular opening from a white A2 card front and then embossed the outline using the Tufted Elegance embossing folder. I used three layers of scrap white strips to add some dimension to this frame. I then glued the embossed frame to a card base, and then glued each of the triangular pieces into place inside the frame. Finally, I glued the sentiment along the center and arranged the flowers and leaves and glued them in place. Using the Inky Colour papers really made these quick and simple cards.
Thank you for stopping by today!
Karen.


