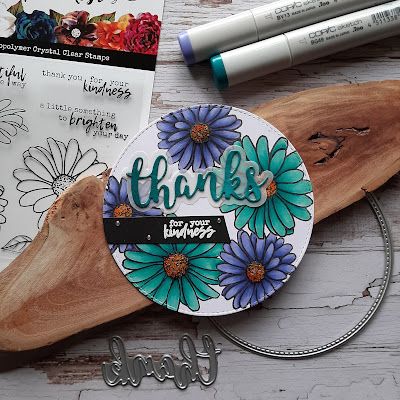
Hi Everyone,
I am just loving this 'Daisy' release from Paper Rose.
They are so versatile.
For today's card I have used the 'Daisy Day's' stamp set.
Ingredients
Stamp Set: #18490 Daisy Days
Medium: Copic Markers
(YR07, YR04, YR15, BG49, BG15, BG13, BG32, BV08, BV04, BV13, BV02)
Sentiment: Included in stamp set & #17472 Thanks Layered
Card Stock: X-Press It Blending Card, Vellum, Black Card
Ink: Ink on 3 Blackout, Catherine Pooler Midnight, Veramark
Other: Glossy Accents, Ink on 3 Liquid Pixie Dust, Swarovski Crystals, White Embossing Powder, Clear Micro Beads
Method:
- Card Base: Using the largest Stitched Circle die, cut a piece of the X-Press It Blending Card.
- Stamp the Daisies with Blackout ink. (You will need to make a mask of the Daisies because they will overlap).
- Colour Daisies with Copic Markers.
- Cut 'Thanks' Layered die from white card & Vellum. Adhere Vellum piece to card. Colour "thanks' with copic marker, apply Liquid Pixie Dust and adhere to card when dry.
- One a piece of black card, stamp and embossing 'kindness' sentiment. Trim and adhere to card.
- Apply Crystals, and Clear Micro Beads, Allow to dry.
Until next time
Melissa
xxxxx


